Tuesday, May 23, 2006

How Sweet It Is: Limoncello Biscotti

Springs gifts was the excuse I came up with for the nearly 30 bottles of limoncello crammed on a counter in my kitchen this April. I want to be one of those people who bestows little jars of fig jam and rhubarb confit on her friends when the season so inspires. But when I started giving the bottles away, they seemed lonely. A bottle of limoncello is nice, but it would be nicer if it had something to go with it. Biscotti—no doubt because it’s Italian—was the first treat that came to mind.

I hopped online and did my favorite thing when it comes to seeking out new recipes: Googled. Going for the obvious, I typed limoncello and biscotti. I’m not sure what I thought would come up. A website devoted solely to biscotti recipes intended to complement Italian lemon liqueur, I suppose. What I found was better. A recipe on recipegoldmine.com and aaa-recipes.com for Limoncello-Pine Nut Biscotti.


Biscotti is one of those treats that looks as if it requires expertise to make. Maybe it’s the way it’s usually packaged in coffee shops and bakeries, in elegant individual wrappers tied with grosgrain ribbon or clustered in pretty glass jars. Or maybe it’s the distinctive shape, unlike most generically round cookies. I gave myself plenty of time—an entire evening—to attempt my first batch. Ten minutes after I started mixing the ingredients, my biscotti was baking in the oven. I had cut it and baked it once again when my sister walked into the kitchen, did a double take at the baking sheet, and gave it the ultimate compliment: “Wow, that actually looks like biscotti.”

This recipe is so easy and so good. Its caramely pine nut sweetness is perfect with the limoncello, which is underscored by the tart of lemon and bite of alcohol. I modified the recipe slightly, but credit is due to the websites I mention above. Along with pairing it with limoncello, it is also good the traditional way, dunked in a cup of coffee.

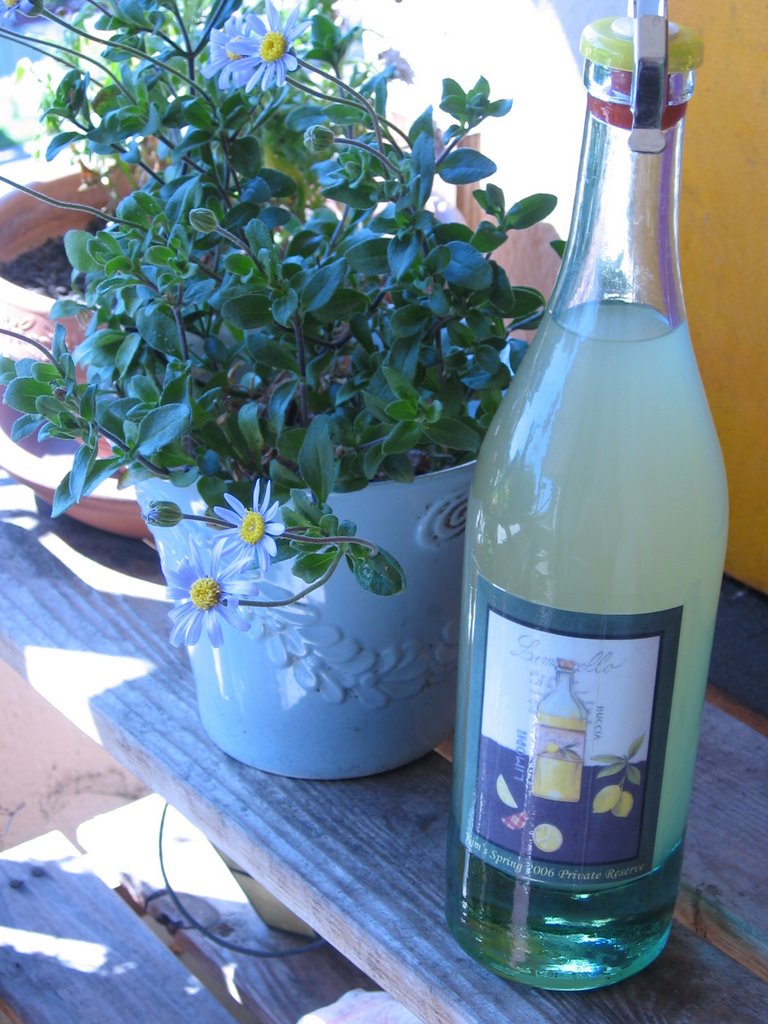
(P.S. My limoncello has now been tested in Seattle and Paso Robles, and the raves were unanimous. You must to make some. You can order the small bottles in the photograph from specialtybottle.com.)

Limoncello-Pine Nut Biscotti
Ingredients:

- 1 cup all-purpose flour (I also tried this recipe with whole wheat flour, which gives the biscotti a heartier flavor. I like the whole wheat version better)
- ½ cup granulated organic sugar, plus a bit extra to sprinkle on top
- a generous pinch of good sea salt
- ½ tsp baking powder
- 3 Tbsp cold, unsalted butter, cut into tiny pieces, plus extra for buttering the pan
- 1 large egg
- 1 tsp pure vanilla extract
- zest of 2 large lemons (if you can pick the lemons yourself, that’s the best)
- 2 Tbsp limoncello
- ¾ cup toasted pine nuts

Directions:
Preheat the oven to 350 degrees. Butter a cookie sheet.

1. Place the flour, sugar, salt and baking powder in the bowl of a food processor and pulse briefly to blend.
2. Add the chopped butter and pulse briefly a few times, until the butter is broken down into very tiny bits.
3. In a small bowl, whisk together the egg, vanilla extract, lemon zest and limoncello. Add this and the pine nuts to the food processor and pulse very briefly, just to blend. The mixture should be moist but crumbly.
4. Turn it out onto a flat surface and press it together. Press the dough away from you using the palm of you hand once or twice so everything is well moistened.
5. Form the dough into a ball. Cut the dough in half and roll each section into a 1-inch-thick rope. I made mine a little bigger, because I wanted larger pieces. Keep in mind, though, that the dough is going to expand in the oven. If the dough seems too sticky, dust your hands with flour while rolling it.
6. Place the two ropes on the baking sheet a few inches apart. Flatten the tops slightly.
7. Sprinkle lightly with sugar and bake until lightly golden, about 30 minutes.
8. Remove from the oven and let sit for about 5 minutes to cool slightly. If the logs are too hot when you try to slice them, they can break.

Cutting the biscotti:

When the two ropes are cool enough to remove from the sheet pan without breaking, place them on a flat surface and cut into approximately ½-inch slices, cutting on an angle using a quick, clean stroke with a sharp chef's knife. A sawing motion may cause the biscotti to break. Don’t worry if they feel a bit crumbly. If you handle them gently, they will be fine.

Place the cut biscotti, cut side up, back on the sheet pan, and bake for about 10 minutes longer, or until they are lightly browned.

When cool, store in a covered container. They will keep about one week.

Monday, April 24, 2006

Ca Kho: Clay Pot Fish


Last autumn, I spent five weeks traveling the length of Vietnam, cooking and eating as part of my research for Communion: Meditations on Eating in Vietnam, to be published in Spring 2007 by Things Asian Press. It was an incredible trip, and particularly meaningful for me, since I lived in Vietnam from 1995 to 1999. Communion is part travel essay, part cookbook, part history, sociology and philosophy book, exploring the culture of Vietnam through its culinary traditions. It examines how a country eats during times of famine and feast, and how we eat reflects who we are as individuals and communities.

In regard to recipes, I am taking the MFK Fisher approach, which she described in the introduction to Serve It Forth: “Recipes in my book will be there like birds in a tree—if there is comfortable branch.” Because there are many excellent Vietnamese cookbooks available, I think it’s silly to include a ton of recipes in mine. Those who want a comprehensive recipe repertoire should look to the works of Mai Pham, or at my friend Ann Le’s The Little Saigon Cookbook. Instead, I’m including a handful of recipes that captured the unique characters of the regions I visited. One that reflects the southern coastal region is Ca Kho (Clay Pot Fish). This is an incredibly simple dish of fish simmered in a light caramel sauce, and it is ridiculously good, with its extremes of sweet and spicy. So far, I’ve made it three times here at home, and I am continuing my experiments with different kinds of fish. I would love to have others try this recipe and give me their feedback. Since I'm also new to recipe writing, suggestions on this aspect are also appreciated.

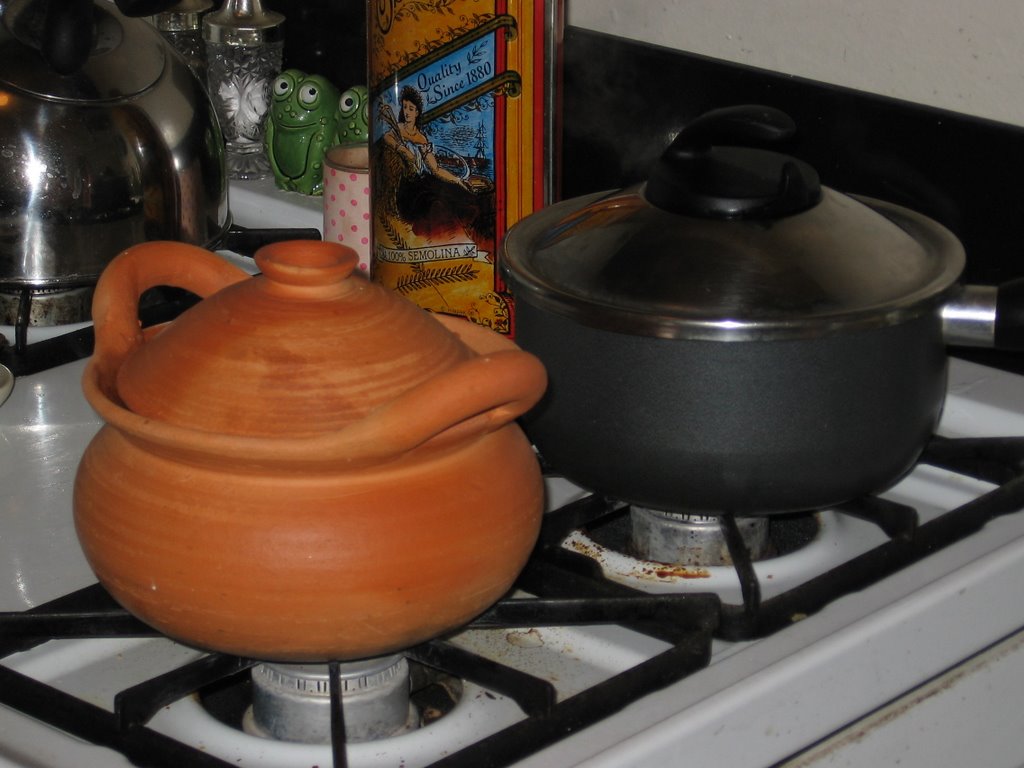
I picked up this clay pot at Bangkok Market in L.A.

CA KHO/CLAY POT FISH – 1 serving

PREPARE FISH:

- ½ lb. halibut cut into 1-inch chunks. (Cod is too oily and breaks apart while simmering. Grouper is used in Vietnam. My friend Ann Le recommends catfish. I have also tried this with chicken, which is terrific. And my friend Janet used shrimp, which she said is her favorite so far.)
- 1 Tbsp. fish sauce (see below for my note on fish sauce)
- up to 1 Tbsp. peanut oil

1. Marinate the cut fish in fish sauce, add a little oil.
2. Put fish in a clay pot. Pour the remainder of marinade over the top of the fish. (TIP: I first warm the clay pot with hot water, to keep it from cracking when it heats up on the stove.)

PREPARE SAUCE:

- 2 Tbsp. peanut oil
- 4 Tbsp. organic sugar
- 2 Tbsp. shallots, minced
- 1 clove garlic, minced
- 2 1-inch chunks ginger, peeled
- ½ cup coconut juice, not milk! (I use water, because I don’t have a sweet tooth)
- 2 whole red Thai chilies
- 1 Tbsp. fish sauce
- pinch black pepper

1. Heat oil in a heavy bottom pan. Add sugar and reduce until sugar dissolves. The mixture may seem too dry at first, or the sugar may crystallize a bit. Be patient and keep stirring. Make sure the heat is high enough. Eventually, the sugar will dissolve.
2. Add minced shallots, garlic and ginger.
3. Add coconut juice or water. Make sure it’s hot before you add it. If not, the cold liquid hitting the hot oil/sugar will cause an instant case of hard candy. If this happens, just keep stirring until the “candy” dissolves.
4. Add chilies.
5. Add fish sauce.
6. Add a pinch of black pepper.
7. Bring the sauce to a boil and then down to a simmer.
8. Put clay pot with fish on a burner and heat. Don’t brown the fish, but simply warm it up a bit. Now that I’ve used my clay pot a few times, it produces the most mouth-watering smell when I heat it up.
9. Add caramel sauce to clay pot.
10. Simmer, covered, for 20 minutes.

You can multiply this recipe and make it in a large clay pot for groups. When expanding the recipe, cut back on the oil in both parts of the recipe. If you do a true multiplication of the oil, the dish will be too ... you got it: oily. For accompaniment, I suggest something neutral, since the sauce is very flavorful. Try a green veggie such as Chinese broccoli stir-fried in garlic, peanut oil and maybe even a little oyster sauce. Serve plenty of rice for sopping up the sauce. (Trader Joe's brown California rice is the best.) I actually drank the remaining sauce the last time I tried this.

Remove chilis before serving. Or WARN guests that they are there. I speak from experience! Also let them know that there are big chunks of ginger, which are not meant to be eaten.

Note on Fish Sauce:
This is a controversial subject, since Vietnamese fish sauce, which is considered the best by many (thus the controversy), is not available in the U.S. Most fish sauces you can buy are from Thailand, and all that I’ve found so far during my research have sugar added to them. A true fish sauce is made only with whole anchovies and salt. You may need to experiment with a few brands before you find one that works for you: fish sauce is essential to the balance of hot, sour, salty and sweet in your dish. I’m fairly happy with the King Crab brand I get at the Bangkok Supermarket on Melrose Avenue in L.A.

Note on Chilies:
Not being a chef, I didn't know the dangers of chilies until recently, when preparing this dish for a party of 25 in Paso Robles. I prepped the ingredients the night before the party in my apartment in L.A. I minced approximately 40 red Thai chilies, bare-handed. I spent the rest of the evening, nearly 6 hours, with my hands soaking in a bowl of iced buttermilk. I took them out only to drink more red wine, which was working in conjunction with the buttermilk to ease what is possibly the most excruciating pain I have ever experienced, and to switch to the next Sex and the City episode on my DVD player. I finally fell asleep at 1 a.m., after taking a Xanax, with my hands wrapped around frozen packages of edamame. When mincing chilies, USE GLOVES!

P.S. The top pic was taken by my sis. She took all the photos for the book.

Wednesday, April 12, 2006

Spring Fling: Limoncello

For the perfected version of my limoncello recipe without all the blah, blah, blah of how I got there below, click here.

I blame Vietnamese food for my latest obsession: limoncello. (Jamie Oliver and a pasta maker left behind by a former boyfriend were responsible for last year’s passion for homemade pasta.) It may sound like a leap, from bahn cuon to Italian liqueur, but because I’m writing a book about the former, I started reading Best Food Writing 2005, for inspiration and to check out what other foodie scribes are up to these days.

I opened the anthology at random, and the first essay I read was Bitter Alchemy, by Deirdre Heekin (originally published in Gastronomica). Heekin writes eloquently about her discovery of rosalio, in which you “gather roses in perfect bloom during the hottest hours of a June day when their perfume is at their headiest.” Making liqueur in such a way sounded like the most romantic pursuit in the world, but I was reading about it in December, not June.

As I began researching, in preparation for gathering my own roses come summer, I learned about other appealing sounding liqueurs, such as nocino (which requires green walnuts picked in June, as well) and limoncello. I’m ashamed to say that I’d never heard of limoncello, but my cousin Jeanne had, and assured me it was worth making. December in most places may not be prime harvest time, but in L.A., at least in the driveway behind my apartment, it is when my lemon tree starts bearing bear fruit.


The lemons on my tree are the most miraculous tasting fruit I’ve ever eaten. Their flavor is sharp, tart and pure. When they are in season, I squeeze them onto everything I make, from broiled salmon to artichoke pasta. I’m the only person in our apartment building who picks them (this still boggles my mind), and I can never use them all up. My discovery of limoncello seemed serendipitous, the perfect way to use every single lemon on the tree and to pass the time until I could tackle rosalio and nocino.
Nowadays, my first step when plotting a new concoction is to get online and check out every recipe available. I found six good limoncello recipes, all authoritative and all different. So I hopped onto eGullet and spent an entire afternoon reading the seven-page forum on limoncello, moderated—unofficially—by a lemon liqueur queen named Katie Loeb. The main argument in the forum was whether to use grain alcohol or vodka. Most voted for vodka, but a few purists were adamant—grain alcohol is what is used in Italy, and without it, you can’t make the real deal. I decided to try both.

My first batches were finally ready last week. The vodka batch is good, but the bottom line—in my opinion—is you can taste the vodka. It’s like some yummy lemondrop-type cocktail you might order in a fancy bar here in L.A. The grain alcohol version, on the other hand, is smooth and unique. The friends I’ve had the chance to test it on agree.

Following is how I stumbled my way through the process and came up with Batch #1 of the grain alcohol version. A few days ago, I started on Batch #2 with the last of the lemons from my tree. I plan to play with it a little, as I explain in the recipe below. Check back in three months for the result.


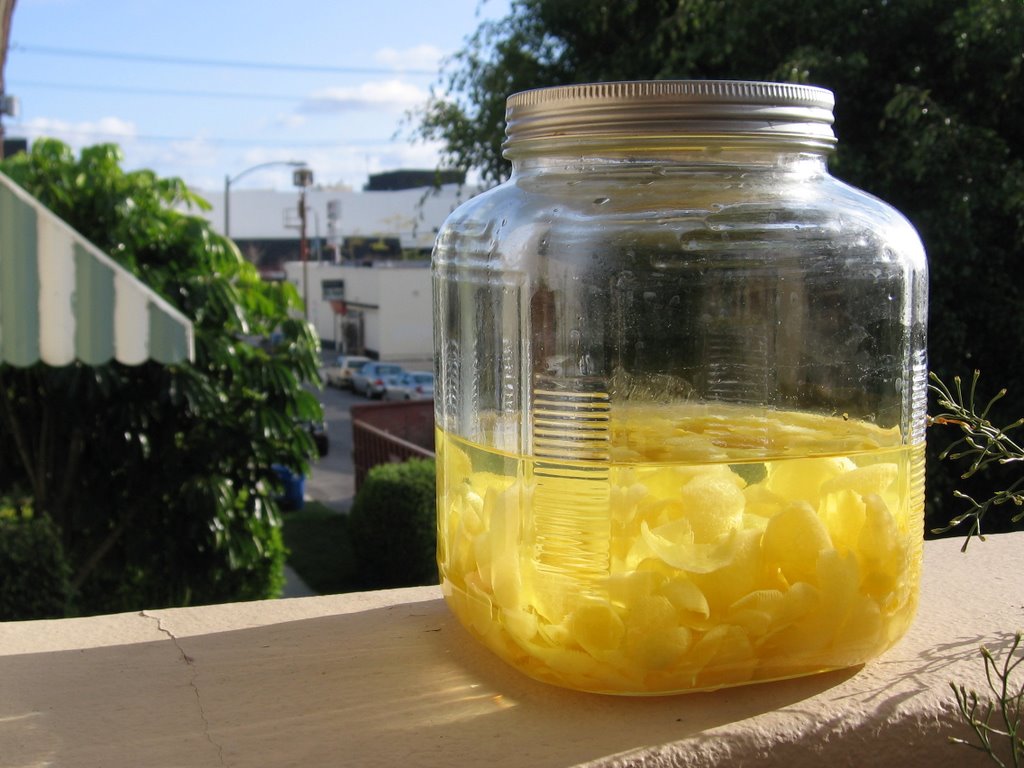
Lemon zest soaking in alcohol: Day 1


Limoncello, Phase One

- Choose 24 medium size lemons or 12 large lemons. When I say large, I mean huge. The ones from my tree are the size of grapefruit. Use organic lemons, since the alcohol is going to suck out every bit of oil (and pesticide, if it’s there) from the zest.
- Peel the zest from the lemons. Make sure not to get any pith, since it will make the liqueur bitter. I’ve heard that a microplane works well, but since I don’t have one, I used a serrated vegetable peeler.
- Put the skins in a jar and dump in two 750 ml bottles of 150 proof Everclear. Leave in the jar in a cool, dark place for approximately three weeks. You’re ready to move on when the zest has turned white and the alcohol is yellow.

Limoncello, Phase Two
- Strain the zest from the alcohol. Squeeze any oil, if possible, from the zest and add to the alcohol.
- Mix the lemony alcohol with a simple syrup of 6 cups water and 4 cups sugar. Liquid should turn slightly cloudy. Put the jar back in its cool, dark place for three more weeks.

Limoncello, Phase Three
- Taste. I put a small dose in the freezer and had friends sample it. Most loved it, but after burning off a few eyelashes, and agreeing that it was wrong to intentionally give someone a glass of brain damage, we came to the consensus that it was too strong.
- Dilute to taste. I diluted the first batch I made with a simple syrup of 6 cups water and 1 cup sugar. For a stronger kick, I diluted the second batch I made with a simple syrup of 3 cups water and a 1/2 cup sugar.
- Let sit for two more weeks.

Limoncello, Phase Four
- Pour into bottles.
- Make labels.
- Fill baskets with limoncello, homemade fig jam (experiments to come) and homemade biscotti (experiments to come), and you have the perfect spring gift for friends.

This recipe yields approximately 16 cups of limoncello.


The finished product